Your cart is currently empty!
Blog
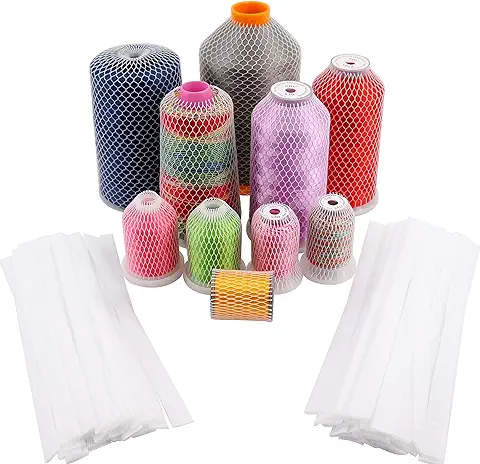
THREAD NETS
How to Use a Thread Net for Smooth Embroidery
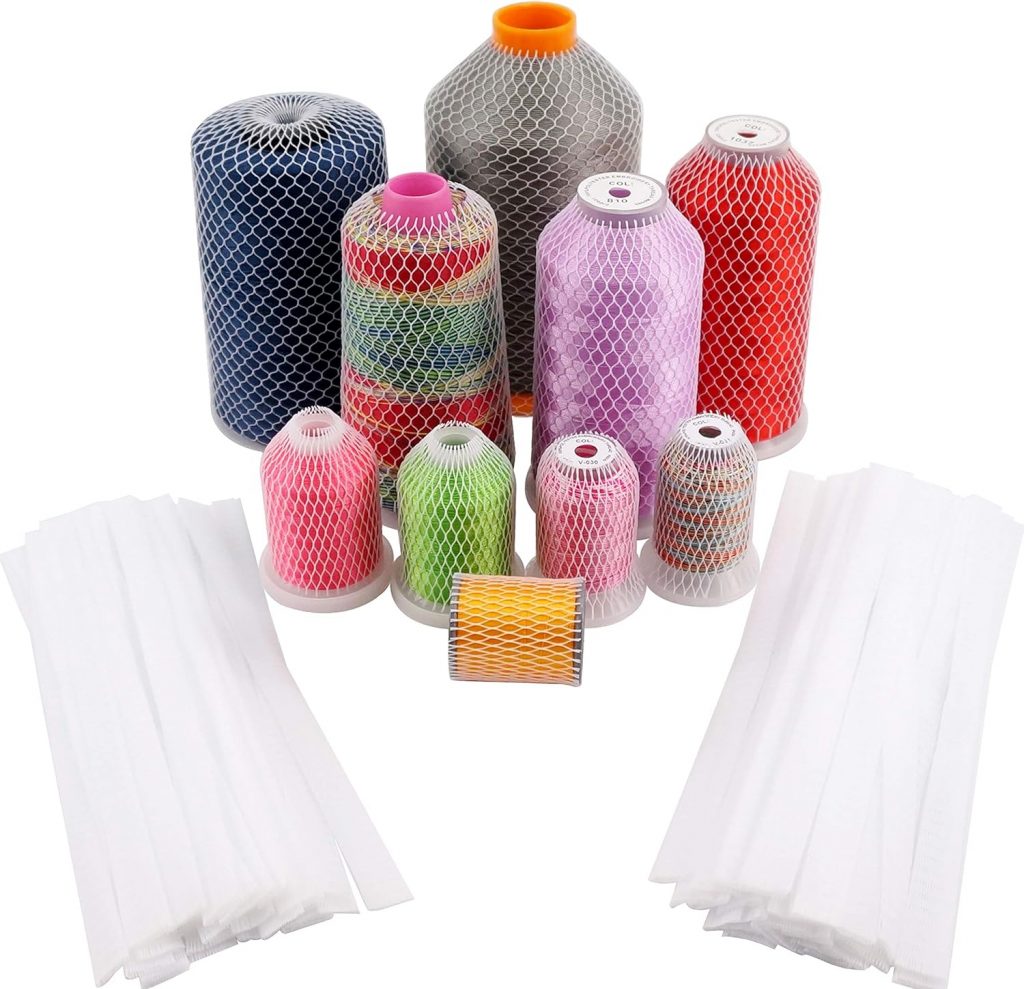
A Thread Net is a mesh sleeve that fits over a spool or cone of thread to prevent it from unwinding too quickly or tangling while sewing or embroidering. It helps control the thread’s tension, ensuring a smooth and even feed into the machine.
Benefits of Using Thread Nets
Thread nets have several advantages, especially for embroidery and high-speed sewing:
✔ Prevents tangling: Keeps thread from getting caught around the spool pin.
✔ Controls slippery threads: Helps metallic and polyester threads stay in place.
✔ Reduces thread breakage: Stops thread tails from falling off the spool.
✔ Improves tension consistency: Ensures the thread feeds smoothly, avoiding jerks or snags.
How to Use a Thread Net
- For smaller spools: Cut the net in half.
- For larger spools: Double the net over for a snug fit.
- For pre-threaded machines: Slip the net onto the comb from the bottom, ensuring the thread feeds from the top to prevent unraveling.
- See our Video Demonstration
When to Use a Thread Net in Embroidery
Using a thread net can improve the quality and consistency of your embroidery. Here are some situations where it’s particularly helpful:
1. Slippery Threads (Rayon, Polyester, Metallic)
- Threads like rayon, polyester, and metallics tend to slip off the spool quickly, leading to tangles or uneven tension.
- A thread net controls the unwinding and prevents excessive looping.
2. Large Cones on Home Embroidery Machines
- Many home embroidery machines work best with smaller spools. If you’re using large cones, a thread net helps regulate the thread release and prevents tangling at the base.
3. High-Speed Embroidery
- When running an embroidery machine at high speeds, thread can bounce around or unwind too fast, leading to breakage. A thread net steadies the flow for smoother stitching.
4. Metallic and Specialty Threads
- Metallic threads are prone to kinking, curling, and breaking. A thread net reduces tension fluctuations, allowing for even feeding.
5. Old or Loosely Wound Spools
- Older or loosely wound spools can slip down and wrap around the spool pin, causing disruptions. A thread net helps keep everything in place.
Bonus Tip: Adjusting for Best Results
- If the thread unwinds too quickly, pull the net slightly past the top of the spool.
- If the thread feeds too slowly, trim the net so it doesn’t cover too much of the thread.
🎥 Watch This Video for a Quick Demonstration!
Using a thread net is a simple yet effective way to improve your embroidery experience. Give it a try and enjoy smoother stitching!
Must-Have Machine Embroidery Tools: The Ultimate Guide
Machine embroidery is an exciting and creative craft, but having the right tools can make all the difference in achieving professional-quality results. Whether you’re a beginner or an experienced embroiderer, this guide covers 20 essential machine embroidery tools you need for smooth stitching, perfect designs, and a hassle-free experience.
1. Embroidery Machine Needles
Choosing the right needle ensures clean stitches and prevents fabric damage. Universal, ballpoint, and embroidery-specific needles each have their purpose.
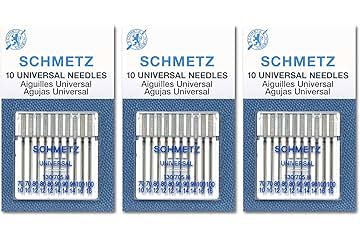
👉 Shop Embroidery Needles Here
2. Stabilizers
Stabilizers keep fabric from shifting and stretching while embroidering. Choose from cutaway, tearaway, and washaway types based on your project.
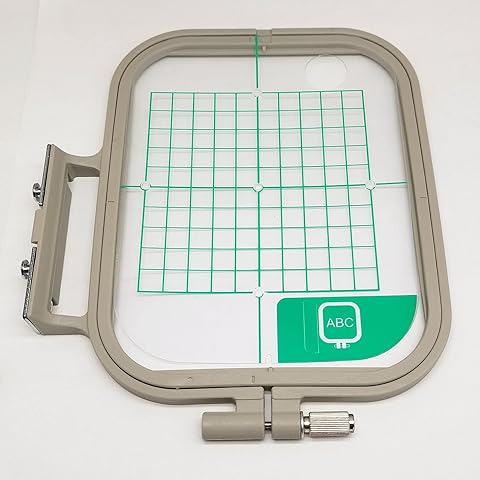
3. Embroidery Hoops
A good hoop holds your fabric taut, reducing most puckering. Look for adjustable and magnetic hoops for better stability. Be sure your particular machine can hold a magnetic hoop.
4. Embroidery Scissors
Small, sharp scissors help trim thread cleanly and get close to the fabric without fraying. We recommend the 6″ Professional scissors.

Get in those close areas! 👉 Shop Embroidery Scissors Here.
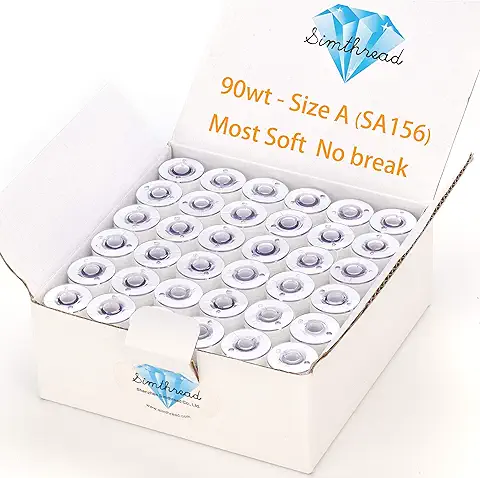
5. Bobbins and Bobbin Thread
Pre-wound bobbins or high-quality bobbin thread ensures even stitching and fewer thread breaks.
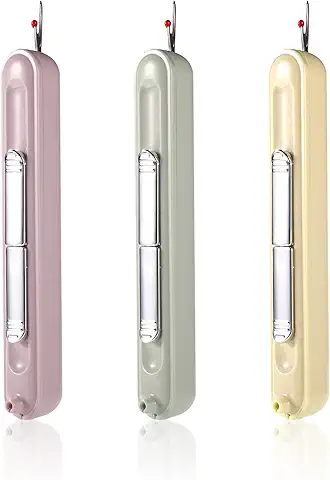
5a. Thread Nets
A Thread Net is a mesh sleeve that fits over a spool or cone of thread to prevent unwinding or tangling while sewing or embroidering. Helps control thread’s tension for a smooth and even feed into your machine.
Watch our Video on Thread Nets, Hoops, and Stabilizers here!
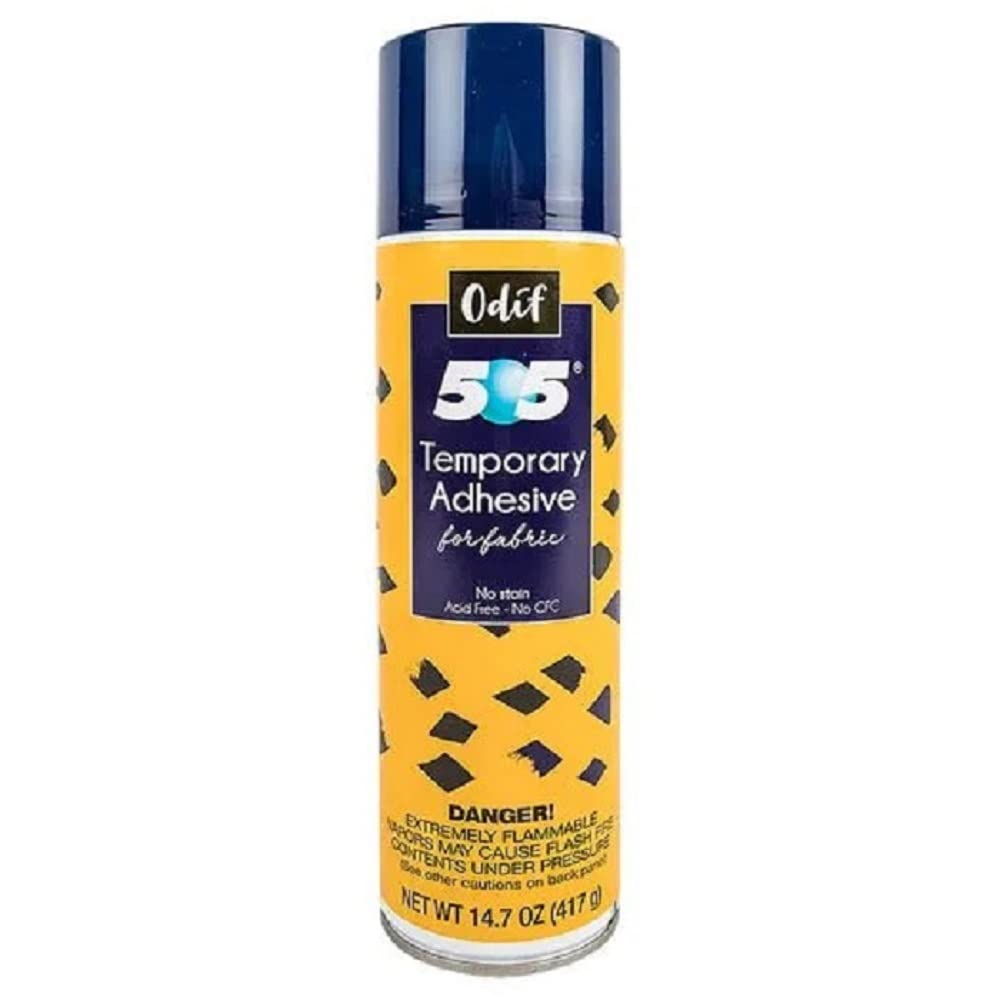
Prevent your thread from straying! 6. Temporary Adhesive Spray
Adhesive spray keeps fabric and stabilizers in place without gumming up your needle.
Temporary Adhesive 7. Fabric Marking Tools
Marking pens and chalk help with placement and alignment of designs.
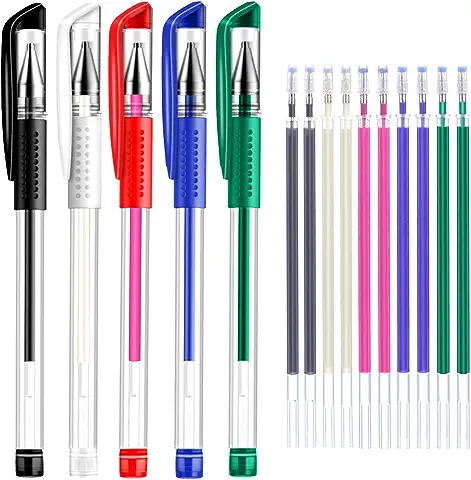
👉 Shop Fabric Marking Tools Here
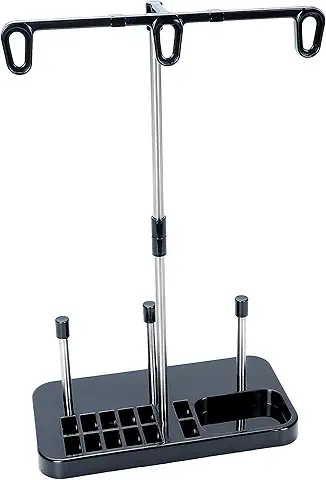
8. Thread Stand
A thread stand helps maintain consistent tension and prevents tangling. These stands help with keeping your threads in line. You can purchase a single stand or a 3-Part.
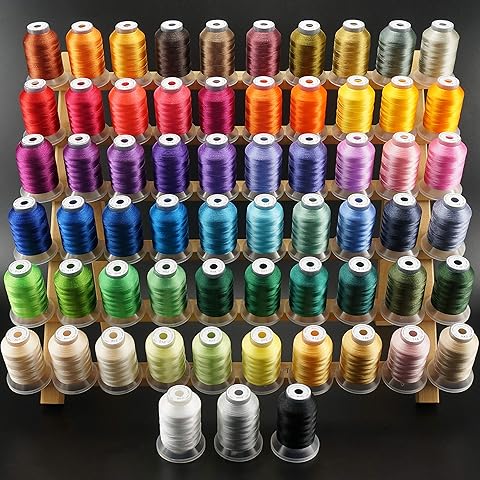
9. High-Quality Embroidery Thread
Using rayon or polyester embroidery thread ensures vibrant, long-lasting designs.
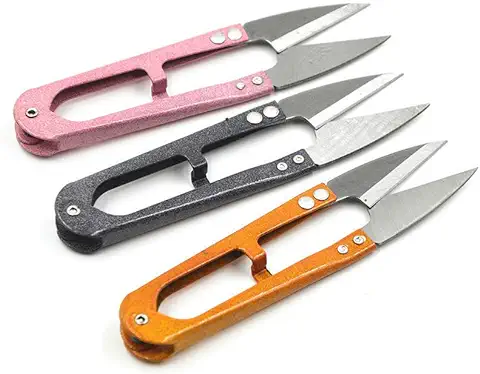
10. Thread Snips
Quickly cut jump stitches and excess thread with compact, sharp thread snips.
11. Bobbin Case
A spare bobbin case is helpful for adjusting tension and switching between different thread types.

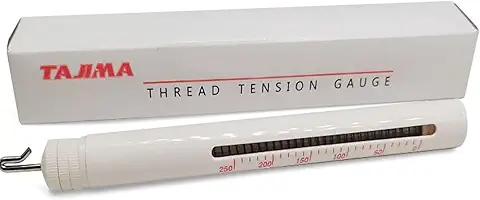
12. Tension Gauge
A tension gauge ensures even stitches by measuring thread tension correctly.
13. Lightbox or LED Lamp
A well-lit workspace helps with precise alignment and visibility of stitches.
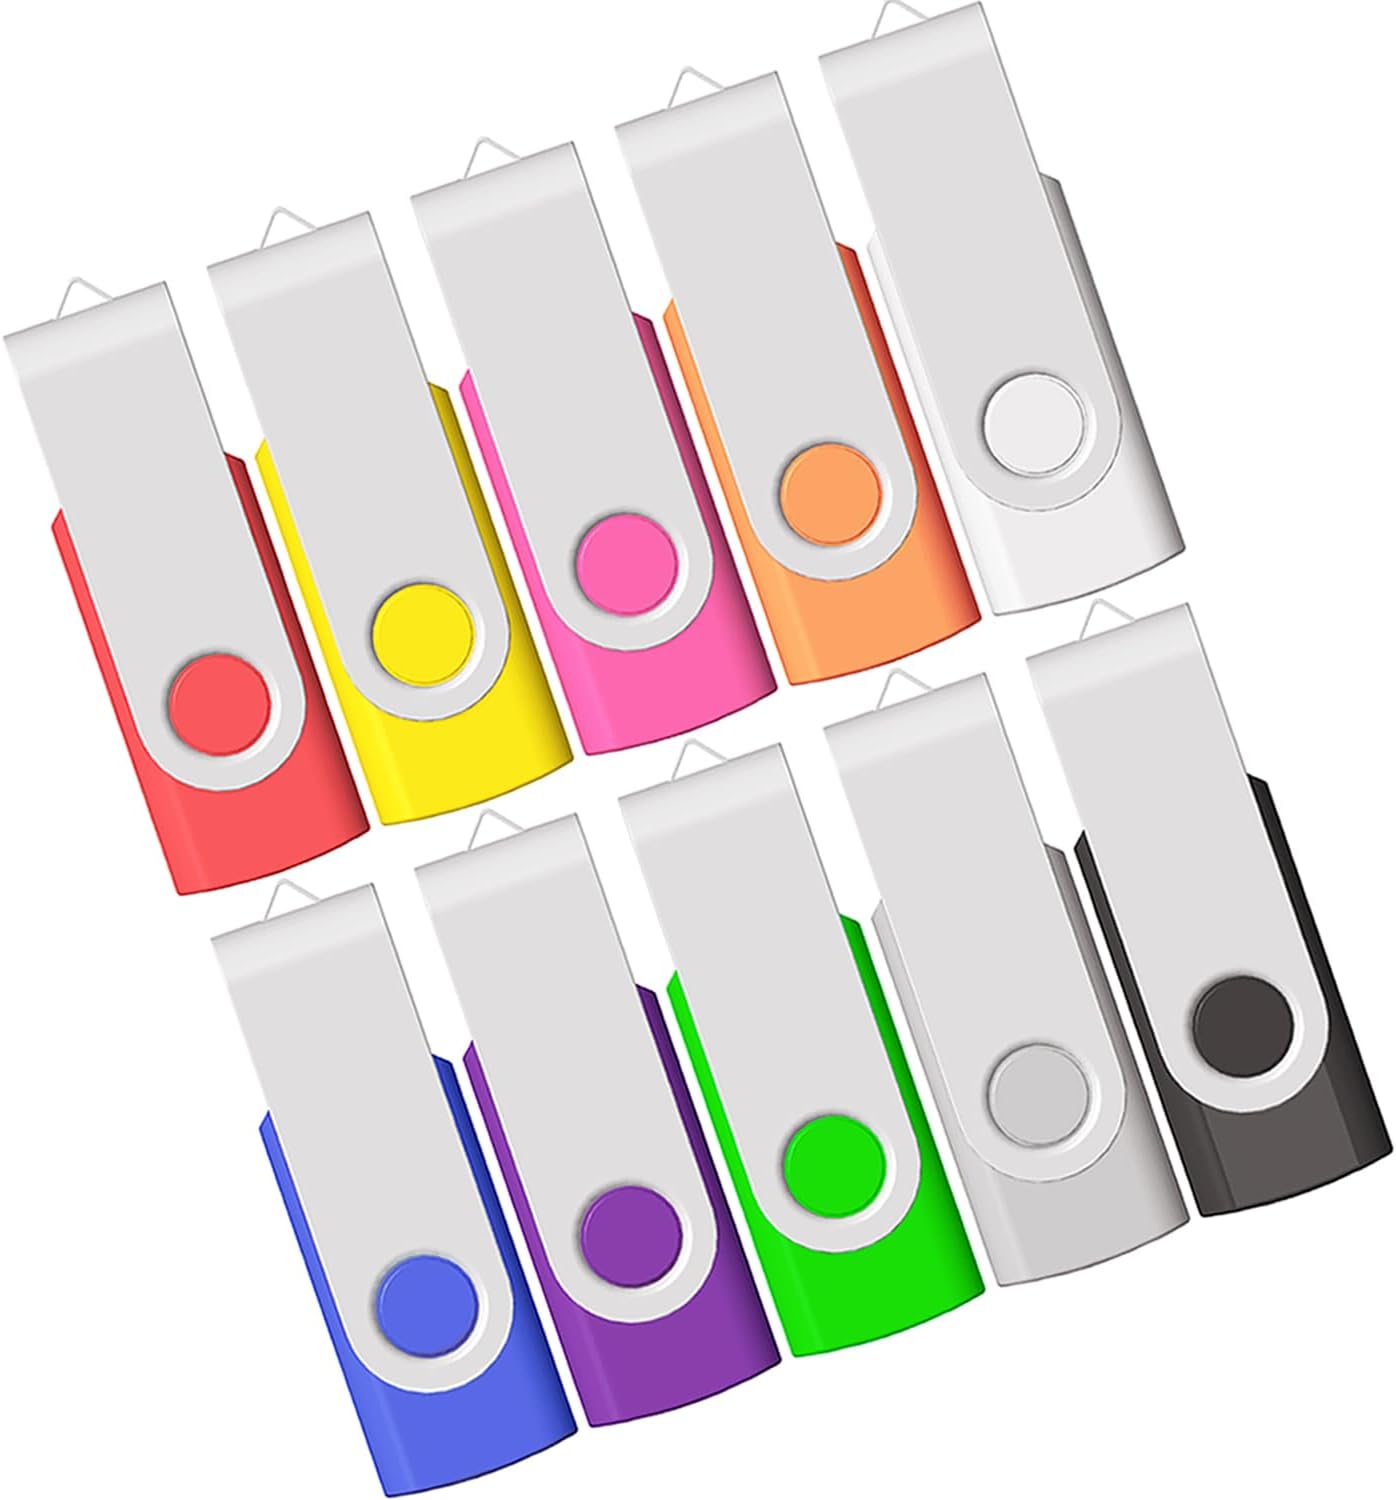
14. USB Drive for Design Downloads
Many embroidery machines require a USB to transfer digital patterns. The older machines required cable to cable.
15. Machine Cover
Protects your embroidery machine from dust and debris when not in use. There are a large assortment of machine covers, or you could sew your own. We recommend the portable cover on wheels.
16. Hoop Mat or Non-Slip Pad
A hoop mat stabilizes your hoop while positioning fabric.
17. Appliqué Scissors
Appliqué scissors make precise cuts for intricate designs. These scissors reach the tightest spots.

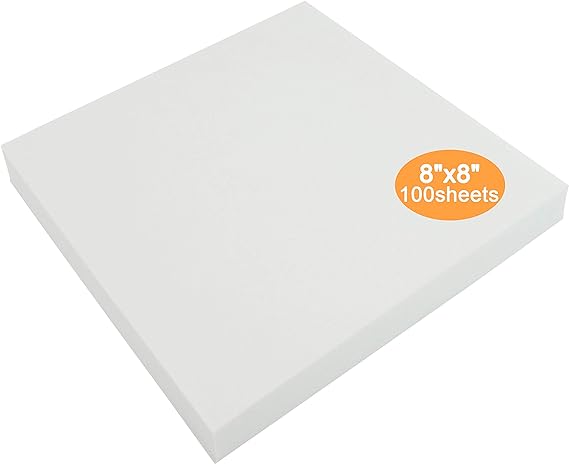
18. Water-Soluble Stabilizer Sheets
Stabilizer Sheets create a clean finish for freestanding lace, sheer fabrics, and most fabrics. There is a top stabilizer to place on top of terry cloth, so threads don’t get stuck in fabric.
👉 Shop Water-Soluble Stabilizers Here
19. Seam Ripper
A must-have tool for fixing mistakes without damaging fabric. We recommend the 2 in 1 Needle Threader Seam Ripper.
20. Embroidery Software
Software allows you to edit and customize designs before stitching. You can choose from basic to professional software that allows you to design and digitize your own embroidery graphics.
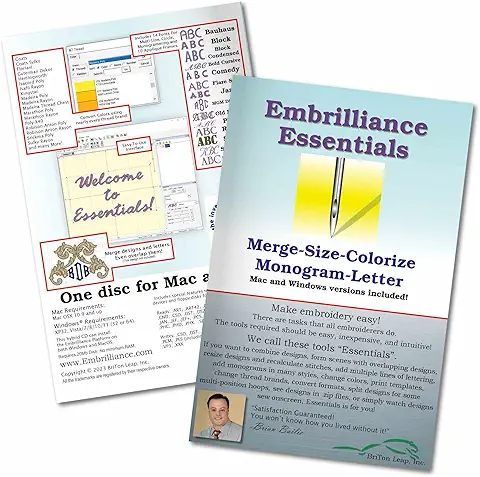
👉 Shop Embroidery Software Here
SEWING MACHINES: We recommend the Brother PE700 Sewing and Embroidery Machine Bundle for Beginners.
Investing in quality machine embroidery tools will help improve your projects, reduce frustration, and extend the life of your machine. Whether you’re creating monograms, patches, or intricate embroidery designs, these essentials will keep your workflow smooth and efficient. This is a great gift for Beginners.
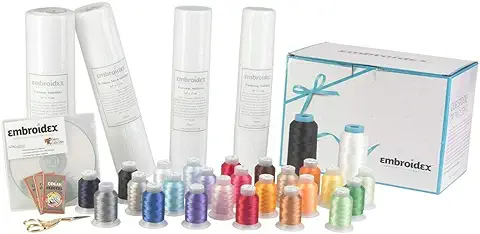
GIFT GIVING – Embroidery Kits are the perfect gift for birthdays, christmas, graduations. Help the Beginner get started with these gifts. Embroidex Embroidery Machine Starter Kit – Everything Needed to Do Machine Embroidery Thread, Stabilizer, Bobbin Needles Etc Plus Bonus Embroidery Designs and Instructional CD
Gift Machine Patterns for Brother PES on USB Over 600,000 Embroidery Designs, incredible collection on a 32GB USB Stick. FREE viewer included. Please note this should not be connected directly to your machine. We recommend you transfer all the designs to your computer, then copy the design(s) you wish to stitch out to a smaller thumb drive to connect to your machine. Knowledge of how to use Embroidery Designs or have the proper software to view or catalog them is expected. The product is for the usb and designs only, it’s up to you to utilize a viewer of your choice.

🔷If you purchase a product through one of my affiliate links, it does not change the price you pay. You are not obligated to click on any affiliate links, but if you choose to do so, I appreciate your support, as it helps keep my website running.
🔷Happy Stitching!
Mastering Thick Fabrics: 6 Essential Sewing Tips for Perfect Stitches
Sewing thick fabrics like denim, canvas, leather, and upholstery fabric can be tricky, but with the right techniques and tools, you can achieve good, finished projects.
Here are six essential tips:
1. Use the Right Needle
- Choose a heavy-duty needle (size 90/14, 100/16, or even 110/18) depending on the thickness of the fabric.
- For leather or vinyl, use a leather needle with a wedge-shaped tip to prevent tearing. You can find needles here.
- Change your needle often, between each project unless your project is large, to ensure clean stitches.
2. Adjust Thread & Tension
- Use a strong thread like polyester, heavy-duty nylon, or upholstery thread—avoid cotton, as it may break.
- Adjust your tension settings: increase the upper thread tension if the stitches are loose or uneven.
- If the bobbin thread is too tight, adjust the bobbin case slightly.
3. Choose the Right Presser Foot
- A walking foot helps feed thick layers evenly, preventing puckering.
- A roller foot or Teflon foot is great for sticky fabrics like vinyl or leather.
- For multiple layers, use a jeans or hump jumper to glide over thick seams.
4. Use a Stabilizer or Interfacing stabilizer:
- Tear-away stabilizers add support for structured fabrics and prevent skipped stitches.
- Water-soluble stabilizers help when working with tricky materials like velvet or fleece.
- For leather or vinyl, tissue paper under the fabric reduces friction.
5. Adjust Stitch Length & Speed
- Increase your stitch length to 3.5–4.5mm to prevent overly tight stitches that can weaken thick fabric.
- Sew slowly and evenly—rushing can cause skipped stitches or needle breaks.
6. Press & Use Clips Instead of Pins
- Steam press seams open to reduce bulk before sewing.
- Instead of pins, use binder clips, Wonder Clips, or fabric glue to hold thick layers together without distortion.
- If needed, hammer seams flat before stitching to reduce bulk.
These tips will help you sew thick fabrics with ease! Do you have a specific fabric you’re working with? Leave your special fabric in our Comments. Let us know any Topic, you wish us to explore in our BLOG.
Visit HoneyBee’s YouTube Channel
ETSY STORE – Honeybeelynn Creations
NOTE: We earn small $$$s for our Affiliate Links but to no cost to Customers.
READING and ART
The Magic of Reading and Art: Fun Projects for Pre-K and Kindergarten Kids!
Reading with young children is one of the best ways to spark their imagination, build vocabulary, and create lasting memories. When you combine books with hands-on art projects, learning becomes even more engaging and fun! If you have a little one in Pre-K or Kindergarten, this post is for you! Get ready for an exciting adventure filled with classic books, creative crafts, and a special YouTube video featuring a heartwarming mom-and-daughter reading session of a beloved Dr. Seuss book.
Why Reading and Art Matter
Pairing books with creative activities helps reinforce learning by: ✅ Improving fine motor skills ✅ Enhancing comprehension and storytelling abilities ✅ Encouraging creativity and self-expression ✅ Strengthening the bond between parents and children
When kids actively engage in a story through art, they remember it longer and develop a deeper love for reading! Dr. Seuss books are an age-old tradition for kids. From his first book in 1937 And to Think That I Saw It on Mulberry Street in 1937 to Daisy-Head Mayzie in 1995 these books are whimsical, rhyming stories filled with imaginative characters and artwork, playful language, and meaningful life lessons that entertain and inspire readers of all ages.
Art Projects to Bring Books to Life!
After reading time, why not make the story even more magical with some hands-on art projects? Here are a few creative ideas that are easy, fun, and educational.
🎨 Thing 1 and Thing 2 Handprint Art (Inspired by “The Cat in the Hat“)
- Use blue paint for the hair and red for the body.
- Let kids stamp their hands onto paper and then draw the mischievous Things’ faces!
🎨 Green Eggs and Ham Paper Plate Craft
- Paint a paper plate green and cut out a “yolk” from yellow construction paper.
- Glue it on and create your own version of Dr. Seuss’s famous dish!
🎨 Fishbowl Craft (Inspired by “One Fish, Two Fish, Red Fish, Blue Fish“)
- Cut out a fishbowl shape from blue paper.
- Have kids finger-paint different colored fish.
- Write the colors next to each fish to reinforce learning.
🎨 Very Hungry Caterpillar Fingerprint Art
- Use green and red paint for the caterpillar’s body.
- Have your child use their fingers to stamp circles onto paper and create their very own hungry caterpillar!
🎨 Brown Bear Puppet
- Use a brown paper bag and construction paper to create a puppet of Brown Bear.
- Let your child retell the story using their puppet!
1. And to Think That I Saw It on Mulberry Street
2. The 500 Hats of Bartholomew Cubbins
3. The King’s Stilts
4. Horton Hatches the Egg
5. McElligot’s Pool
6. Thidwick the Big-Hearted Moose
7. Bartholomew and the Oobleck
8. If I Ran the Zoo
9. Scrambled Eggs Super!
10. Horton Hears a Who!
11. On Beyond Zebra!
12. If I Ran the Circus
13. The Cat in the Hat
14. How the Grinch Stole Christmas!
15. Yertle the Turtle and Other Stories
16. The Cat in the Hat Comes Back
17. Happy Birthday to You!
18. Green Eggs and Ham
19. One Fish Two Fish Red Fish Blue Fish
20. The Sneetches and Other Stories
21. Dr. Seuss’s Sleep Book
22. Hop on Pop
23. Dr. Seuss’s ABC
24. Fox in Socks
25. I Had Trouble in Getting to Solla Sollew
26. The Cat in the Hat Songbook
27. The Foot Book
28. I Can Lick 30 Tigers Today! and Other Stories
29. My Book About Me
30. I Can Draw It Myself
31. Mr. Brown Can Moo! Can You?
32. The Lorax
33. Marvin K. Mooney Will You Please Go Now!
34. Did I Ever Tell You How Lucky You Are?
35. The Shape of Me and Other Stuff
36. Great Day for Up
37. There’s a Wocket in My Pocket!
38. Oh, the Thinks You Can Think!
39. I Can Read with My Eyes Shut!
40. Oh Say Can You Say?
41. Hunches in Bunches
42. The Butter Battle Book
43. You’re Only Old Once!
44. Oh, the Places You’ll Go!
45. Daisy-Head Mayzie
Dr. Seuss books are a treasure for everyone! There are so many books to read that will keep you delighted for the rest of your life! Explore these books in your local library, on-line libraries or on-line stores. You don’t even have to leave the house. Make it your ‘daily reading time’.
To receive our FREE Self-Care Planner, join our Email Newsletter List to receive updates to our Blog and our Store!
The Proper Materials to Use in Your Machine Embroidery Projects
Machine embroidery is a beautiful craft that combines creativity with precision. To ensure your projects turn out perfectly, it’s essential to use the right materials. Here’s a comprehensive guide to the key components: needles, thread, fabric, and stabilizers.
1. Needles
Choosing the correct needle is crucial for achieving clean, professional-looking embroidery.
- Embroidery Needles: These have a slightly larger eye to accommodate embroidery thread, reducing the risk of thread breakage.
- Size Matters: Use smaller needles (size 75/11) for lightweight fabrics and larger needles (size 90/14) for thicker materials.
- Needle Types: Ballpoint needles are best for knit fabrics, while sharp needles work well on woven materials.
2. Thread
The type of thread you use can greatly impact the final look of your embroidery.
- Rayon Thread: Known for its high sheen, rayon thread adds a glossy, smooth finish. It’s ideal for decorative projects.
- Polyester Thread: Durable and colorfast, polyester thread is perfect for items that will be washed frequently.
- Cotton Thread: Provides a soft, matte finish, making it great for a more subtle look.
3. Fabric
The fabric you choose serves as the canvas for your embroidery, and different fabrics yield different results.
- Cotton: A popular choice due to its stability and ease of use. Ideal for beginners.
- Linen: Offers a more textured look but may require a stronger stabilizer due to its looser weave.
- Knits: Require extra care and appropriate stabilizers to prevent stretching and puckering.
- Specialty Fabrics: For delicate fabrics like silk or velvet, use appropriate needles and stabilizers to protect the material.
4. Stabilizers
Stabilizers are essential to keep your fabric from shifting during embroidery, ensuring a clean and precise design.
- Cut-Away Stabilizer: Best for stretchy fabrics like knits. Provides long-term support.
- Tear-Away Stabilizer: Ideal for stable fabrics like cotton. Easy to remove after stitching.
- Water-Soluble Stabilizer: Perfect for delicate fabrics or designs that require a stabilizer that completely disappears.
- Heat-Away Stabilizer: Great for projects where water isn’t an option. Dissolves with the application of heat.
Tips for Success:
- Match Materials: Always match your thread and needle to your fabric type for the best results.
- Test First: Before starting your final project, do a test run on a scrap piece of fabric.
- Change Needles Regularly: A dull needle can cause skipped stitches or damage to your fabric.
Using the right materials will not only make your embroidery process smoother but also result in higher-quality finished projects. Explore these materials in your next embroidery venture and see the difference for yourself!
How Thread Knots Can Ruin Your Stitches and How to Fix Them
If you’ve ever experienced thread knots while machine embroidery or hand stitching, you know how frustrating they can be. Not only do they ruin the flow of your project, but they can also lead to uneven stitches, fabric damage, and a lot of wasted time. In this blog post, we’ll dive into how thread knots can negatively impact your work and share practical tips to fix them, so your stitches remain neat and professional every time.
How Thread Knots Can Ruin Your Stitches
- Uneven Tension Thread knots disrupt the smooth flow of thread through the needle and bobbin, causing uneven tension in your stitches. This leads to irregular and inconsistent stitches throughout your design.
- Frayed Thread When thread knots form, they put pressure on the thread, causing it to fray or break. Frayed thread results in weak and loose stitches, which can lead to a sloppy finish.
- Stitching Disruption A knot caught in your machine’s mechanism can stop the stitching process entirely, forcing you to stop and untangle the mess. It’s a major disruption that may result in skipped or crooked stitches.
- Inconsistent Design Thread knots can also pull your fabric in unpredictable directions, misaligning the design and causing distortion. This makes the overall project look unprofessional and uneven.
- Stitch Gaps If a knot pulls the fabric too tightly or unevenly, you might notice gaps between your stitches. This can affect the design’s aesthetic, making it look incomplete or messy.
- Thread Snags Knots tend to catch on fabric, particularly on delicate or textured materials, creating visible snags. These snags can ruin the integrity of your fabric and lead to further unraveling.
- Thread Breakage Knots create stress points along the thread. Over time, these pressure spots can cause the thread to snap, interrupting the stitching process and ruining your design.
- Buildup of Knots If knots continue to form and aren’t fixed quickly, they can build up and cause tangles in the fabric, leading to a very messy and frustrating sewing experience.
How to Fix Thread Knots and Prevent Them in the Future
The good news is that thread knots are avoidable with the right techniques and some simple troubleshooting. Here are some tips to help you fix and prevent thread knots in your future projects:
- Re-thread the Machine The first step when you notice knots is to stop the machine and re-thread both the top and bobbin threads. Ensure the threads are properly inserted, and the spool is correctly placed.
- Check Your Thread Tension Thread tension is crucial for smooth stitches. If the top and bottom threads aren’t meeting correctly, knots can form. Adjust the tension on your machine to ensure even tension on both threads.
- Use a Thread Conditioner Applying a thread conditioner can reduce friction as the thread passes through the machine, preventing knots and tangles. This is particularly useful when working with thinner or more delicate threads.
- Choose a Lighter Needle If you’re encountering frequent knots, consider using a smaller needle for delicate fabrics. A properly sized needle reduces strain on the thread and prevents knots from forming.
- Trim Excess Thread Before you start stitching, be sure to trim the ends of your threads. Check for fray build-up in bobbin area. Excess thread hanging from the spool or bobbin can easily get tangled and cause knots during stitching.
- Slow Down the Machine If your machine is stitching too quickly, the thread may not flow smoothly, causing knots. Try reducing the stitching speed to give the thread time to settle evenly.
- Test Stitch on Scrap Fabric Before beginning your actual project, always test your stitching on a scrap piece of fabric. This will allow you to check if the thread is moving smoothly or if knots appear, so you can adjust accordingly.
- Clean Your Machine Regularly A dusty machine can contribute to thread tension issues and knots. Clean out the bobbin area and needle plate to ensure everything is free of lint or debris.
- Use the Right Stabilizer Choosing the right stabilizer is essential for preventing fabric from shifting and causing knots. Make sure you’re using the proper stabilizer that matches the fabric type you’re working with.
- Replace Damaged Thread If you notice any fraying or wear on your thread, replace it immediately. Damaged thread is more likely to tangle and knot, affecting the quality of your project.
Conclusion
Thread knots are a common issue in both machine embroidery and hand stitching, but they don’t have to ruin your projects. By following these tips and addressing any knotting issues promptly, you can keep your stitching smooth, professional, and free of frustration. Always remember to use proper techniques, the right tools, and to clean your machine regularly to prevent thread knots and maintain a high-quality finish on every project!
With these simple steps, you’ll be able to prevent and fix thread knots with ease, ensuring your sewing and embroidery projects stay on track and look their best! Keep all your supplies in one place with this handy acrylic box with over 400 items included. See quick embroidery tips on our Channel.
7 Tips for Seniors to Save Money
Posted on
1. Look for Senior Discounts. Many businesses, from restaurants to retail stores and even public transportation, offer senior discounts. It’s always worth asking if there’s a discount available.
2. Cut Prescription Costs. Check if your prescriptions are available as generics and consider using a mail-order pharmacy for lower prices. Programs like GoodRx or state pharmaceutical assistance programs can also help cut medication costs.
3. Use Energy-Efficiency Programs. Many utility companies offer discounts and energy-efficiency programs for seniors. Small changes, like adjusting your thermostat or switching to LED bulbs, can also reduce energy bills.
4. Take Advantage of Free Entertainment. Libraries, senior centers, and community centers often offer free classes, events, and social gatherings. Streaming services sometimes provide free trials too, so you can avoid cable.
5. Consider Downsizing. If your home is larger than you need, downsizing can reduce mortgage or rent, utility, and maintenance costs, while freeing up some funds for other expenses.
6. Shop Smart for Groceries. Buy generic brands, use coupons, and take advantage of senior discount days at grocery stores. Shop on-line with stores that offer FREE Shipping. Apps like Ibotta can also help you earn cashback on everyday purchases.
7. Use Public Benefits. Look into available programs like Supplemental Nutrition Assistance Program (SNAP) or Low-Income Home Energy Assistance Program (LIHEAP), which help with food and utility costs for those who qualify.
These tips can make a noticeable difference in monthly expenses! Please share your own tips here.Posted in Home & Family, SENIORS | Tagged amazon, energy saver, GoodRx, online-shopping, senior discounts, Shopping, SNAP, tips | Leave a reply
HOW TO USE APPLIQUE WITH MACHINE EMBROIDERY
Simplified guide to using appliqué with machine Embroidery for beginners.
- Choose Fabric: Select the fabric for your appliqué, ensuring it
complements your project. Cotton works well for beginners. - Pick Design. Find a simple embroidery design that includes an appliqué element. Many designs will indicate where the appliqué fabric should be placed.
- Stabilize Your Fabric. Use stabilizer on the back of the fabric where you’ll be placing the appliqué. This helps prevent puckering during embroidery. We recommend Tear Awayx2
- Hoop the stabilizer and fabric together. Make sure it’s taut but not overly stretched.
- Appliqué Fabric. Pic a fabric and/or picture design to match your project. Cut the appliqué fabric slightly larger than the design’s outline. Secure it to the hooped fabric using temporary adhesive or pins, or tape.
- Embroidery Settings. Load the design into your embroidery machine. Follow the machine’s instructions for thread colors and order. Start the machine, and it will first stitch the appliqué outline.
- Trim and Finish. After the outline is stitched, stop the machine. Trim excess appliqué fabric close to the stitching. Resume the machine, and it will complete the design, securing the appliqué in place.
Remember, practice makes perfect, so don’t be afraid to experiment and refine your technique! There are lots of information and books out there on Appliqueing that is worth checking out. Here is one I found most valuable!
Want more information about embroidery or applique and receive a FREE Self-Care Planner? Sign up for our email newsletter
- Choose Fabric: Select the fabric for your appliqué, ensuring it
5 Tips to Save Money on Cyber Monday
Cyber Monday is a great opportunity to snag deals, but it’s easy to overspend without a plan. Here are five tips to help you save money and make the most of this shopping event:
1. Create a Budget and Stick to It
Before Cyber Monday, determine how much you can afford to spend. Prioritize items you truly need or have been waiting to purchase. Having a clear budget prevents impulse buys and keeps your finances in check.
2. Compare Prices Across Multiple Retailers
Don’t settle for the first deal you see! Use price comparison tools or check various websites to ensure you’re getting the best price. Some retailers offer price-matching, so keep that in mind when shopping.
3. Sign Up for Newsletters and Alerts
Many online stores send exclusive discounts to their email subscribers or app users. Sign up before Cyber Monday to receive early access to deals or special promo codes. Bonus: You can unsubscribe after the event!
4. Take Advantage of Free Shipping Offers
Shipping fees can add up quickly, negating the savings from your purchases. Look for retailers offering free shipping on Cyber Monday or consider consolidating orders from one store to meet free shipping thresholds.
5. Use Cashback and Discount Apps
Maximize your savings by using apps like Rakuten, Honey, or Capital One Shopping. These tools can provide cashback on purchases or automatically apply coupon codes at checkout, saving you both time and money.
Cyber Monday can be a treasure trove of deals if you shop smart. By planning ahead and using these tips, you can save big without overspending. Happy Shopping!
How to Use Animal Embroidery Designs to Add Playfulness to Your Projects
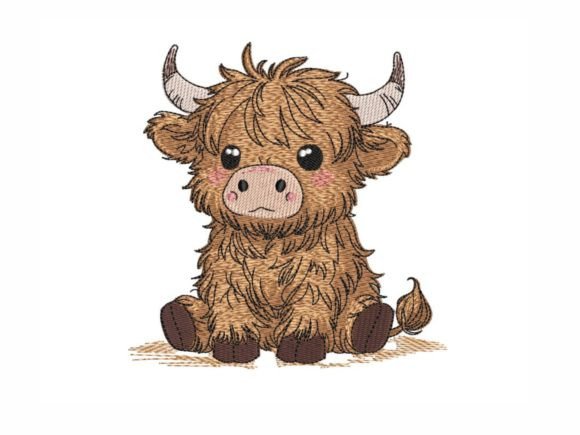
Animal embroidery designs have a special way of bringing personality, charm, and a touch of whimsy to any project. Whether you’re creating decor for your home, a personalized gift, or crafting for fun, incorporating playful and whimsical embroidery patterns can transform your creations into something truly unique. In this post, we’ll explore how to use animal machine embroidery designs, like foxes, dragons, highland cows and more, to add a playful vibe to your projects.
1. Add Whimsy to Kids’ Clothing and Accessories
Children’s clothing and accessories are perfect canvases for playful embroidery designs. Imagine a bright red Baby Red Dragon embroidered on a baby’s onesie, or a cute Christmas Fox on a toddler’s backpack. These designs add an element of fun and make everyday items extra special. For birthdays or holidays, you can customize shirts, bibs, or jackets with animal machine embroidery to create unique and memorable gifts.
Pro Tip: Use bright, vibrant threads to make the designs pop and consider pairing them with complementary fabric colors for a cohesive look.
2. Bring Personality to Home Decor
Animal embroidery isn’t just for clothing — it can be a charming addition to home decor as well. For example, a pillow featuring the whimsical Christmas Foxes embroidery design could bring a festive touch to your living room during the holidays. Similarly, adding embroidered butterflies to your table linens or a Rottweiler design to a wall hanging can infuse your space with character and warmth. These designs appeal to nature and animal lovers alike and make your home decor feel personalized and inviting.
Creative Idea: Use embroidered animal patterns on fabric coasters, placemats, or even curtains to create a theme for a particular room or season.
3. Make Unique and Personalized Gifts
Gifts that incorporate animal embroidery designs show thoughtfulness and creativity. For dog lovers, a tote bag or blanket featuring a Black Labrador Retriever design is a heartfelt and personal gesture. If you’re creating for a fantasy enthusiast, the Baby Red Dragon embroidery design can add a magical flair to their favorite accessory. These playful designs are versatile and can be tailored to match the recipient’s personality, making your gift truly one-of-a-kind.
Idea for Gifting: Create a custom embroidery hoop with an animal design and frame it as wall art. It’s a simple yet impactful way to create something meaningful.
4. Add Fun to Seasonal Projects
Seasonal embroidery projects offer endless possibilities for incorporating animal designs. From the Christmas Highland Cow for holiday decor to butterfly patterns for springtime celebrations, these designs can help set the mood for any season. They’re perfect for creating festive table runners, stockings, or banners that stand out and delight guests.
Tip: Pair animal designs with seasonal motifs, like leaves for fall or snowflakes for winter, to create cohesive seasonal decorations.
Why Choose Our Animal Embroidery Designs?
Each of our animal embroidery designs is crafted with attention to detail and creativity. They’re perfect for crafters of all skill levels, and the high-quality files ensure a smooth stitching process every time. Whether you’re working on a gift, decor, or a personal project, our designs bring the playfulness and whimsy you’re looking for.
Ready to get started? Check out our full collection of animal embroidery designs in our ETSY Store. From foxes to dragons and beyond, we have everything you need to make your next project unforgettable.
Conclusion
Animal embroidery designs offer a delightful way to add playfulness and personality to your creations. Whether you’re designing for kids, sprucing up your home, or crafting unique gifts, whimsical embroidery patterns like foxes, dragons, and butterflies are sure to make your projects shine. Explore the endless possibilities and let your imagination take flight with our animal-themed machine embroidery designs.